


Home owners Lloyd and Aimee Meyers and their two children, Caroline and Landon, like their home, but they’re not so fond of their ’80s kitchen area.
So, we’re assisting this household with an inexpensive renovation — at just $1,200 in components — that will depart a huge influence!
We’re bringing this ’80s-fashion kitchen into the 21st century with a specific two-part episode. This article covers section two of the task. (Skipped portion just one? Catch up listed here!)
Touching Up the Cabinets
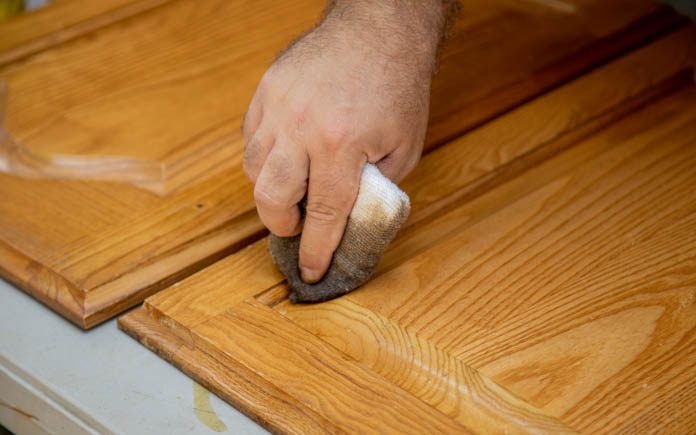
Lloyd and Aimee’s cupboards, in general, are in great condition. Nevertheless, they have a couple of unattractive scratches.
The home owners really do not want to paint these cupboards for the reason that they appreciate the prosperous wooden grain. Alternatively, we’re touching up the stain and providing them a contemporary coat of polyurethane.
In part 1 of this venture, we cleaned and prepped the cupboards. In this episode, Chelsea shows Lloyd how to appropriately apply stain, ready a number of minutes for it to sink into the wood, before taking away it.

Soon after the polyurethane has dried, we spot the cabinet doors again on the boxes and set up new elegant pulls.
It is these types of a straightforward change — adding new hardware — but 1 issue is specified: these cupboards no lengthier scream 1980s!
Greatest of all, Aimee enjoys how the refinished cabinets and new hardware completely rework her kitchen.
Replacing the Backsplash
Lloyd and Aimee’s kitchen area had just two compact backsplashes in the form of dated ceramic tile driving the sink and oven.
We’re changing people with classy subway tiles — and this new, sweeping backsplash will go over each and every wall in the workspace. The end result will be a steady glimpse that leaves a dramatic impact.
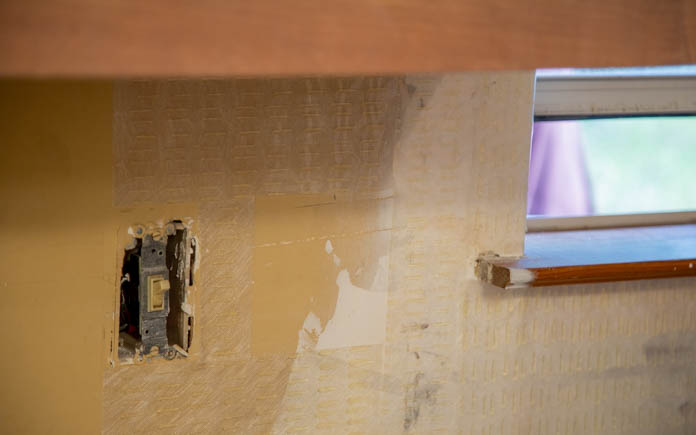
We ran into just 1 stumbling block ahead of commencing function on the new backsplash. We eliminated the old backsplash and realized it eliminated parts of the wall.
Things do not always go as planned in the course of property advancements, but in this situation, we just changed the drywall. Straightforward adequate!
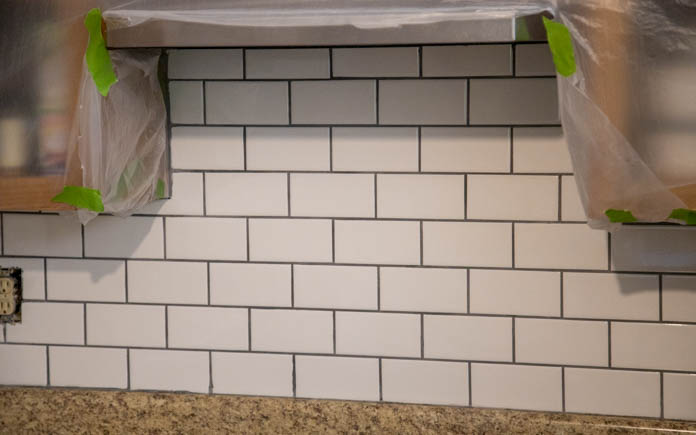
For the backsplash set up, we use SimpleMat from Custom made Developing Products and solutions. It is fundamentally a double-sided sticker. Initial, you apply SimpleMat to the wall. Then, eliminate the adhesive entrance and apply tiles to the SimpleMat. Following that, grout the tiles and get rid of the excess.
You can discover far more about the approach in our how-to video clip.
This website page has affiliate one-way links. If you acquire a product or service from these hyperlinks, we will gain a tiny fee at no extra charge to you.
Refinishing the Countertops
This kitchen’s countertops are in great shape, but the plastic laminate no for a longer time wows Lloyd and Aimee. And these countertops won’t appear good future to the shiny white backsplash we have mounted.
Just one simple decor trick is to update two adjacent surfaces with contrasting shades. The subway tiles are white, so these counter tops will be black.
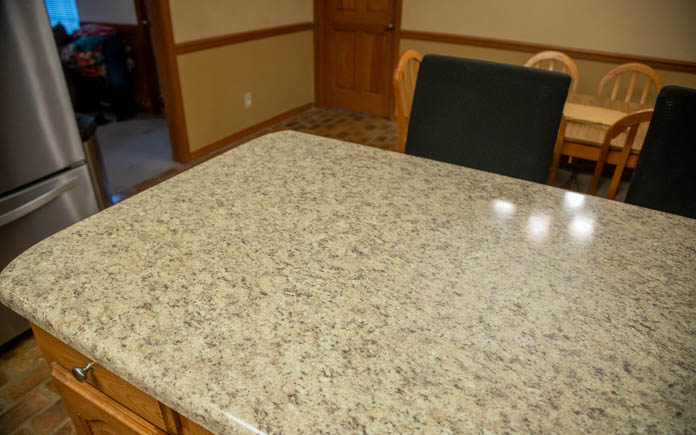
You can paint laminate counter tops, but we’re going to do one thing excess specific, resurfacing them with Daich Coatings’ SpreadStone Countertop Refinishing Kit.
This product, observed in Volcanic Black, mainly mixes dark paint with real stones for a stunning countertop makeover, and the software couldn’t be easier.
First, we sand the counter tops to clean out the laminate and eliminate any grime. Then we clear the countertop so primer will bond to it.

At the time the primer is dry, we apply the stone coating, as directed, and allow it dry. Afterward, we sand it so the stone shines as a result of, giving the countertop a magnificent granite appear.
Last but not least, we finish it off with sealer.

Generation Ideas
When we initially saw the Meyers’ kitchen area, it was stuck in the ’80s and in dire have to have of a fashionable makeover.
By painting more than mustard-colored walls, replacing outdated mild fixtures and installing a new backsplash, this kitchen is now in the 21st century!
The new wall colour is lighter and brighter. The cabinets seem new, with a fresh new coat of polyurethane and classy pulls. And the white subway tile backsplash contrasts beautifully with the dark countertops and light fixtures.
More Stories
Window Film Ideas to Create Decorative Glass Around Your Home for Less
How Do I Redesign My Kitchen? Start With These 5 Steps
8 Cleaning Hacks to Keep Your House Looking and Smelling Fresh